A neglected house can be a daunting task to clean, but with the right approach and tools, it can be done effectively. From years of dust and grime to stubborn stains and odors, a neglected house requires a thorough cleaning to restore it to its former glory. In this comprehensive guide, we will provide you with practical tips and techniques to tackle the cleaning process, room by room, and ensure that your neglected house is sparkling clean once again. Whether you’re planning to sell your home or simply want to improve its appearance, this guide will help you achieve your goal with ease and efficiency. So, let’s get started!
Preparing for the Cleaning Process
Assessing the Condition of the House
When it comes to cleaning a neglected house, it’s important to start with a thorough assessment of the property’s condition. This step is crucial as it helps you identify the areas that require more attention, allowing you to prioritize your cleaning efforts effectively. Here are some key points to consider when assessing the condition of a neglected house:
- Look for signs of damage or deterioration: As you walk through the house, take note of any signs of damage or deterioration. This could include peeling paint, water stains, mold growth, or worn-out carpets and flooring.
- Identify areas with a high level of grime and dirt: Pay attention to areas where grime and dirt have accumulated over time. These areas may require more intensive cleaning efforts, such as the kitchen, bathrooms, and any rooms with high foot traffic.
- Check for pest infestations: Pests like cockroaches, rodents, and insects can cause significant damage to a house, and their presence can make cleaning even more challenging. Be sure to check for any signs of pest infestations, such as droppings, nests, or unusual smells.
- Take note of any health and safety hazards: A neglected house may contain hazardous materials, such as lead paint, asbestos, or mold. It’s important to identify any potential health and safety hazards before beginning the cleaning process.
By thoroughly assessing the condition of the house, you can create a cleaning plan that addresses the specific needs of the property. This will help ensure that you are able to effectively tackle the cleaning process and restore the house to a safe and habitable condition.
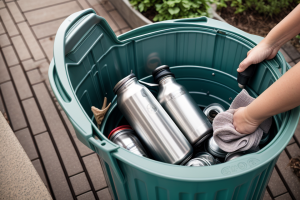
Gathering Necessary Supplies
Before beginning the cleaning process, it is essential to gather all the necessary supplies. The following is a list of cleaning supplies that are required for a thorough cleaning:
- Buckets and mops
- Cleaning solution (such as bleach or vinegar)
- Scouring pads or steel wool
- Brooms and dustpans
- Vacuum cleaner
- Trash bags
- Gloves
- Disinfectant spray
- Microfiber cloths
- Mop and bucket
It is important to purchase cost-effective supplies that will last throughout the cleaning process. Here are some tips for purchasing supplies that will be effective and efficient:
- Look for supplies that are durable and long-lasting.
- Purchase supplies in bulk to save money.
- Consider reusable supplies, such as microfiber cloths, which can be washed and used again.
- Choose supplies that are eco-friendly and safe for the environment.
- Look for supplies that are easy to use and require minimal effort.
By following these tips, you can ensure that you have all the necessary supplies for a thorough cleaning. With the right supplies, you can effectively clean a neglected house and restore it to its former glory.
Cleaning the Exterior of the House
Pressure Washing
When it comes to cleaning the exterior of a neglected house, pressure washing is a highly effective method. Pressure washing involves using high-pressure water to remove dirt, grime, and other debris from surfaces. Here are some tips for properly using a pressure washer and safely cleaning different surfaces:
Properly Using a Pressure Washer
Before you begin pressure washing, it’s important to make sure you have the right equipment. A pressure washer typically consists of a motor, a pump, and a nozzle. The motor and pump work together to create the high-pressure water stream, while the nozzle determines the shape and intensity of the stream.
When using a pressure washer, it’s important to hold the nozzle at a 45-degree angle to the surface you’re cleaning. This will allow the water to reach all areas of the surface and ensure a thorough cleaning.
It’s also important to keep the pressure washer moving at all times to avoid damaging the surface. Never aim the nozzle directly at a surface, as this can cause damage and potentially even destroy the surface entirely.
Safely Cleaning Different Surfaces
Different surfaces require different cleaning methods, and pressure washing can be particularly dangerous for certain surfaces. Here are some tips for safely cleaning different surfaces:
- Concrete and Brick: These surfaces can withstand the high-pressure water stream, but it’s still important to be cautious. Start at the top of the surface and work your way down to avoid creating streaks or missed spots.
- Wood: Wood surfaces can be damaged by the high-pressure water stream, so it’s important to be especially careful when cleaning them. Avoid using a pressure washer on wood surfaces altogether if possible, and instead opt for a different cleaning method.
- Vinyl and Aluminum Siding: These surfaces can be easily damaged by the high-pressure water stream, so it’s important to be especially careful when cleaning them. Use a low-pressure setting and avoid using a nozzle that is too large, as this can cause damage to the surface.
By following these tips, you can effectively clean the exterior of a neglected house using pressure washing.
Power Washing
Power washing is a technique used to clean the exterior of a house by applying high-pressure water to remove dirt, grime, and other contaminants. This method is particularly effective in removing stubborn stains, mold, and mildew from the surface of the house.
Difference between Pressure Washing and Power Washing
Pressure washing and power washing are often used interchangeably, but they refer to two different methods of cleaning. Pressure washing is a technique that uses a high-pressure stream of water to remove dirt and debris from surfaces. Power washing, on the other hand, is a more powerful version of pressure washing that uses a higher pressure and volume of water to clean surfaces.
When to Use Each Method
Pressure washing is suitable for cleaning small areas and surfaces with light to moderate dirt and debris. Power washing, on the other hand, is more effective for cleaning larger areas and surfaces with heavy dirt and debris, such as oil stains, grease, and grime. Power washing is also recommended when the surface of the house has been neglected for a long time and requires a more intensive cleaning.
In conclusion, both pressure washing and power washing are effective methods of cleaning the exterior of a house. The choice of which method to use depends on the level of dirt and debris on the surface and the size of the area to be cleaned.
Window Cleaning
Cleaning the windows of a neglected house can be a daunting task, but it is essential to restore the beauty and functionality of the property. Here are some techniques for cleaning different types of windows:
Techniques for Cleaning Different Types of Windows
- Vertical Windows: For vertical windows, start at the top and work your way down. Use a squeegee or a cloth to wipe down the windows from top to bottom. This technique helps to avoid streaks and ensures that the windows are clean from top to bottom.
- Horizontal Windows: For horizontal windows, use a sponge or a soft cloth to wipe down the windows. Use a solution of warm water and mild detergent to remove dirt and grime. Then, use a clean cloth to wipe down the windows and remove any excess moisture.
- Casement Windows: For casement windows, start at the top and work your way down. Use a soft cloth to wipe down the windows, paying attention to the corners and edges. Use a solution of warm water and mild detergent to remove dirt and grime, and then use a clean cloth to wipe down the windows and remove any excess moisture.
Tips for Removing Stains and Smudges
- Use a Soft Cloth: Use a soft cloth to avoid scratching the windows.
- Avoid Using Abrasive Cleaners: Avoid using abrasive cleaners, as they can scratch the windows and leave streaks.
- Use a Solution of Warm Water and Mild Detergent: Use a solution of warm water and mild detergent to remove dirt and grime. This will help to avoid streaks and ensure that the windows are clean.
- Dry the Windows with a Clean Cloth: Use a clean cloth to dry the windows after cleaning. This will help to avoid streaks and ensure that the windows are clean and dry.
Cleaning the Interior of the House
Decluttering and Organizing
When it comes to cleaning a neglected house, decluttering and organizing is a crucial first step. A cluttered space can make cleaning more difficult and time-consuming, and it can also create an unwelcoming and unorganized living environment. By taking the time to declutter and organize before cleaning, you can make the process more efficient and effective.
Here are some tips for decluttering and organizing your home:
- Start small: It can be overwhelming to try to declutter and organize an entire house at once. Instead, start with one room or area at a time. This will make the process more manageable and help you stay focused.
- Set aside enough time: Decluttering and organizing can be a time-consuming process, so be sure to set aside enough time to complete it thoroughly. It’s better to take your time and do it right than to rush through the process and leave things unfinished.
- Be ruthless: When decluttering, it’s important to be ruthless and get rid of anything that you don’t need or use. This can include old clothes, outdated electronics, and other items that are no longer useful.
- Sort items into categories: Once you’ve decluttered, it’s time to sort items into categories. This can include keeping items, donating them, or selling them. Make sure to label boxes or bags for easy sorting later.
- Create a system for organization: After decluttering and sorting, it’s time to create a system for organization. This can include using baskets or shelves to store items, designating specific areas for specific items, and creating a routine for maintaining organization.
By following these tips, you can effectively declutter and organize your home, making it easier to clean and maintain.
Cleaning the Kitchen
- Techniques for cleaning appliances and surfaces
- The Importance of Regular Cleaning: Regular cleaning of appliances and surfaces in the kitchen is essential for maintaining a healthy and hygienic environment. It helps to prevent the buildup of bacteria and other microorganisms that can cause illnesses. Regular cleaning also helps to remove stubborn stains and odors, leaving the kitchen looking and smelling fresh.
- Cleaning the Refrigerator: The refrigerator is one of the most important appliances in the kitchen, and it requires regular cleaning to maintain its efficiency and longevity. Start by removing all the food and items from the refrigerator and wiping down the shelves and walls with a mild detergent solution. Use a soft brush to clean the coils at the back of the refrigerator, which can accumulate dust and dirt.
- Cleaning the Stove and Oven: The stove and oven are also essential appliances that require regular cleaning. Start by removing any burnt-on food or grease from the stove top using a non-abrasive sponge or cloth. For the oven, use a mixture of baking soda and water to scrub away any stubborn stains. Make sure to clean the oven racks as well, as they can accumulate grease and food particles.
- Cleaning the Dishwasher: The dishwasher is another appliance that requires regular cleaning to maintain its efficiency. Run a cycle with a dishwasher cleaning agent to remove any built-up residue. You can also use a mixture of white vinegar and water to clean the dishwasher, as it is effective at removing mineral deposits and other stains.
- Tips for dealing with tough stains and odors
- Using Vinegar: Vinegar is a natural cleaning agent that can be used to remove tough stains and odors in the kitchen. It is effective at removing grease and grime from surfaces, and it can also help to eliminate odors caused by cooking. Mix equal parts of vinegar and water, and use a sponge or cloth to wipe down surfaces. Allow the mixture to sit for a few minutes before rinsing with water.
- Using Baking Soda: Baking soda is another effective cleaning agent that can be used to remove tough stains and odors in the kitchen. It is particularly effective at removing odors caused by cooking, as it is able to absorb unpleasant smells. Sprinkle baking soda on surfaces, allow it to sit for a few hours, and then vacuum or sweep it up.
- Using Essential Oils: Essential oils, such as lemon or lavender, can be used to eliminate odors in the kitchen. They are natural and non-toxic, and they can be used to clean surfaces and eliminate odors caused by cooking. Mix a few drops of essential oil with water in a spray bottle, and use it to clean surfaces or eliminate odors.
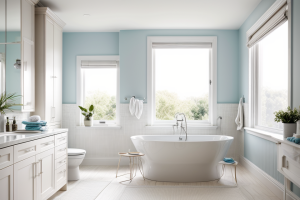
Cleaning the Bathroom
The bathroom is one of the most important areas in the house that requires regular cleaning. It is also one of the most neglected areas in the house, especially if the house has been vacant for a long time. The bathroom is a place where water and other substances are used regularly, which can lead to the buildup of dirt, grime, and mildew. Here are some techniques for cleaning the toilet, sink, and shower, as well as tips for keeping the bathroom clean in the long-term.
Cleaning the Toilet
- Remove the toilet seat and flush the toilet to remove any waste.
- Use a toilet brush to scrub the inside of the toilet bowl, paying particular attention to the areas around the water line.
- Use a disinfectant cleaner to sanitize the toilet bowl and kill any remaining germs.
- Rinse the toilet bowl with clean water and allow it to dry.
- Reattach the toilet seat and flush the toilet once again to remove any remaining debris.
Cleaning the Sink
- Use a sponge or cloth to wipe down the sink and remove any visible dirt and grime.
- Use a scouring pad or steel wool to scrub the sink if there is stubborn grime or stains.
- Use a disinfectant cleaner to sanitize the sink and kill any remaining germs.
- Rinse the sink with clean water and allow it to dry.
Cleaning the Shower
- Use a squeegee or sponge to remove any water from the shower walls and floor.
- Use a shower cleaner or vinegar and water solution to remove any soap scum or hard water stains.
- Use a scouring pad or steel wool to scrub the shower if there is stubborn grime or stains.
- Use a disinfectant cleaner to sanitize the shower and kill any remaining germs.
- Rinse the shower with clean water and allow it to dry.
Tips for Keeping the Bathroom Clean in the Long-Term
- Clean the bathroom regularly to prevent the buildup of dirt and grime.
- Use a shower curtain or bath mat to help keep the bathroom floor dry and prevent mold and mildew growth.
- Use a dehumidifier or air conditioning unit to control humidity levels in the bathroom.
- Use a bathroom fan or vent to exhaust moisture and prevent mold and mildew growth.
- Use a disinfectant cleaner with a pleasant scent to keep the bathroom smelling fresh and clean.
Cleaning the Living Areas
Cleaning the living areas of a neglected house can be a daunting task, but with the right techniques and tools, it can be done efficiently. Here are some techniques and tips for cleaning the floors, furniture, and upholstery in the living areas:
Cleaning the Floors
- Vacuuming: Start by vacuuming the floors to remove loose dirt, dust, and debris. Use a vacuum cleaner with a HEPA filter to capture small particles and allergens.
- Dusting: Use a damp cloth or mop to dust the floors, paying particular attention to corners and baseboards. This will help to remove any remaining dust and dirt.
- Spot cleaning: Use a spot cleaner or a solution of mild detergent and water to clean up any stains or spills on the floors.
Cleaning the Furniture
- Dusting: Use a soft-bristled brush or a lint-free cloth to dust the furniture, paying particular attention to corners and edges. This will help to remove any dust and dirt that has accumulated over time.
- Vacuuming: Use a vacuum cleaner with a crevice tool to clean the upholstery and any other small areas that may be difficult to reach.
- Spot cleaning: Use a spot cleaner or a solution of mild detergent and water to clean up any stains or spills on the furniture.
Cleaning the Upholstery
- Spot cleaning: Use a spot cleaner or a solution of mild detergent and water to clean up any stains or spills on the upholstery.
- Deodorizing: Use a deodorizing spray or a solution of baking soda and vinegar to remove any odors from the upholstery.
Tips for Dealing with Pet Hair and Dust
- Vacuuming: Use a vacuum cleaner with a HEPA filter to capture pet hair and dust.
- Deodorizing: Use a deodorizing spray or a solution of baking soda and vinegar to remove any odors from the floors and furniture.
By following these techniques and tips, you can effectively clean the living areas of a neglected house and restore them to their former glory.
Cleaning the Bedrooms and Closets
Techniques for Cleaning Bedroom Surfaces
- Begin by stripping the bed and washing the linens in hot water and detergent.
- Dust the walls, ceiling fan, and window treatments with a soft-bristled brush or a duster.
- Wipe down all hard surfaces, including the dresser, nightstands, and any other furniture in the room, using a damp cloth and mild soap.
- Vacuum the carpet or flooring, paying special attention to corners and under the bed.
- Clean the mirrors and windows using a glass cleaner and a soft cloth.
Tips for Organizing and Maintaining a Clutter-Free Space
- Make a plan for where everything will go before you start cleaning. This will help you stay organized and efficient during the cleaning process.
- Invest in storage solutions, such as baskets, shelves, and drawer organizers, to keep items in their proper place and prevent clutter from accumulating.
- Create a routine for maintaining a clutter-free space. This could include designating specific times each day or week to tidy up, or setting reminders to put things away as soon as you finish using them.
- Consider implementing a minimalist approach to your belongings. Ask yourself if each item brings value to your life and if it has a purpose in your home. If not, consider donating or disposing of it.
- Enlist the help of family members or roommates in maintaining a clutter-free space. It’s important to establish clear expectations and responsibilities for keeping the space clean and tidy.
Cleaning the Laundry Room
When it comes to cleaning a neglected house, the laundry room is often one of the most overlooked areas. However, it is essential to give this space a thorough cleaning to remove dirt, dust, and grime that have accumulated over time. Here are some techniques and tips for cleaning the laundry room:
Techniques for cleaning the washer, dryer, and laundry room surfaces
- Start by emptying the contents of the washer and dryer, and wiping down the exterior surfaces with a damp cloth.
- Use a mix of water and vinegar to clean the lint trap and the inside of the washing machine.
- For the dryer, remove the lint filter and clean it with a brush or vacuum. Clean the interior of the dryer with a damp cloth and vinegar.
- Use a mild detergent to clean the laundry room surfaces, such as the countertops, cabinets, and floors.
Tips for dealing with stains and odors
- To remove tough stains, sprinkle baking soda on the affected area and let it sit for a few hours before cleaning it up.
- Use white vinegar to remove odors from the laundry room. Simply pour a few drops onto a cloth and wipe down the surfaces.
- To prevent musty odors from coming back, run a dryer cycle with a load of dry towels or sheets after each use.
By following these techniques and tips, you can effectively clean your laundry room and leave it smelling fresh and clean.
Final Cleaning and Maintenance Tips
Conducting a Final Walkthrough
Checking for Cleanliness
Once you have completed the deep cleaning of every room in the house, it’s time to conduct a final walkthrough to ensure that everything is spotless and ready for use. During this walkthrough, you should pay close attention to areas that may have been missed during the cleaning process, such as baseboards, light fixtures, and ceiling fans.
Making Final Touches
As you walk through the house, take note of any areas that may need a little extra attention. This may include dusting blinds or curtains, wiping down countertops, or vacuuming carpets one last time. Don’t forget to check the bathrooms and kitchen, as these areas tend to accumulate the most dirt and grime.
Maintaining a Clean and Organized Home
Now that your house is clean, it’s important to take steps to maintain its cleanliness and organization. Consider implementing a regular cleaning schedule, setting aside time each day or week to dust, vacuum, and tidy up. You may also want to invest in some organizational tools, such as storage bins or drawer organizers, to help keep clutter at bay.
By conducting a final walkthrough and making any necessary final touches, you can ensure that your neglected house is clean and ready for use. With a little bit of effort and attention to detail, you can keep your home looking its best for years to come.
Setting Up a Cleaning Schedule
Maintaining a clean and organized home requires consistent effort and attention. Setting up a cleaning schedule is essential to ensure that regular cleaning sessions are scheduled and followed through.
Importance of Maintaining a Cleaning Schedule
A cleaning schedule helps to create a routine that keeps the house clean and tidy. By establishing a schedule, it becomes easier to keep track of cleaning tasks and ensure that they are completed regularly. Additionally, having a cleaning schedule in place can help to reduce stress and prevent feelings of overwhelm.
Tips for Scheduling Regular Cleaning Sessions
- Set specific days and times for cleaning tasks. This could be weekly, bi-weekly, or monthly, depending on the level of cleaning required.
- Create a checklist of cleaning tasks to be completed during each session. This could include tasks such as dusting, vacuuming, mopping, and cleaning the bathroom and kitchen.
- Allocate specific tasks to specific family members, if applicable. This can help to ensure that everyone is contributing to the cleaning efforts and can make the process more efficient.
- Consider using a cleaning service to help with deep cleaning tasks, particularly if the house has been neglected for a long period of time.
- Make sure to include time for cleaning tasks in the daily routine. This could include tasks such as wiping down countertops and sweeping floors after meals.
By following these tips, it is possible to create a cleaning schedule that works for your household and helps to keep the house clean and tidy on a regular basis.
Incorporating Eco-Friendly Cleaning Practices
Eco-friendly cleaning practices are becoming increasingly popular due to their numerous benefits for both the environment and human health. By using eco-friendly cleaning products, you can reduce your carbon footprint, protect the air you breathe, and prevent harmful chemicals from entering the water supply. Incorporating these practices into your cleaning routine can be simple and effective, and can help make your home a healthier and more sustainable space.
Here are some tips for incorporating eco-friendly cleaning practices into your routine:
- Choose non-toxic cleaning products: When selecting cleaning products, opt for those that are labeled as non-toxic or eco-friendly. These products are made from natural ingredients and do not contain harmful chemicals that can pollute the environment or cause health problems.
- Use natural cleaning agents: There are many natural cleaning agents that can be used in place of harsh chemicals. For example, white vinegar can be used as a natural cleaner and deodorizer, while baking soda can be used to absorb odors and stains.
- Use microfiber cloths: Microfiber cloths are highly absorbent and can be used to clean surfaces without the need for harsh chemicals. They are also reusable and can help reduce waste.
- Avoid single-use cleaning products: Single-use cleaning products, such as disposable wipes, are not only wasteful but also contain harmful chemicals that can pollute the environment. Instead, opt for reusable cleaning tools, such as a squeegee or a mop.
- Practice proper disposal: When disposing of cleaning products, be sure to follow the instructions on the label. Many cleaning products contain hazardous chemicals that should not be poured down the drain or flushed down the toilet.
By incorporating eco-friendly cleaning practices into your routine, you can help reduce your impact on the environment and create a healthier home for yourself and your family.
Storing Cleaning Supplies Properly
- Tips for storing cleaning supplies to maintain their effectiveness
- Store cleaning supplies in a cool, dry place
- Avoid storing cleaning supplies in areas with high temperatures or humidity
- Direct sunlight can cause some cleaning products to degrade faster
- Keep cleaning supplies away from children and pets
- Store cleaning supplies in a locked cabinet or high shelf to prevent accidental ingestion or contact
- Keep all hazardous materials out of reach of children and pets
- Rotate your cleaning supplies
- Use the oldest cleaning supplies first to ensure that they are used before they expire
- This will also help prevent waste and save money
- Store cleaning supplies in a cool, dry place
- How to properly dispose of hazardous cleaning materials
- Follow local regulations for disposing of hazardous materials
- Check the label of the cleaning product for disposal instructions
- Do not pour hazardous cleaning materials down the drain or flush them down the toilet
- Do not put hazardous cleaning materials in regular trash cans
- Take them to a hazardous waste collection site or call your local government for proper disposal instructions.
FAQs
1. What are the steps involved in cleaning a neglected house?
The steps involved in cleaning a neglected house typically include:
1. Assessing the level of dirt and damage: This step involves evaluating the extent of the cleaning job, which will help in determining the amount of time and resources needed for the cleaning process.
2. Decluttering: This step involves removing unnecessary items from the house, which can be either donated or disposed of.
3. Deep cleaning: This step involves cleaning all the surfaces, including walls, floors, and furniture, using appropriate cleaning agents and tools.
4. Disinfecting: This step involves using disinfectants to kill any bacteria or viruses that may be present in the house.
5. Restoring damaged areas: This step involves repairing or replacing any damaged items or surfaces in the house.
6. Maintaining cleanliness: This step involves establishing a cleaning routine to maintain the cleanliness of the house.
2. How long does it take to clean a neglected house?
The time it takes to clean a neglected house can vary depending on the size of the house and the level of cleaning required. However, it is recommended to set aside at least a few days to a week for the cleaning process.
3. What cleaning supplies are needed to clean a neglected house?
The cleaning supplies needed to clean a neglected house can include:
1. Mops, brooms, and dusters
2. Buckets, mops, and cleaning solutions
3. Disinfectants and cleaning agents
4. Scouring pads, steel wool, and abrasive cleaners
5. Gloves, masks, and other personal protective equipment
4. Is it safe to clean a neglected house without professional help?
It is generally safe to clean a neglected house without professional help, but it is important to take necessary precautions, such as wearing personal protective equipment and using appropriate cleaning agents. However, if the level of cleaning required is beyond your capabilities, it is recommended to hire a professional cleaning service.
5. How often should a neglected house be cleaned?
It is recommended to clean a neglected house at least once a month to maintain its cleanliness. However, the frequency of cleaning may vary depending on the level of dirt and damage in the house.