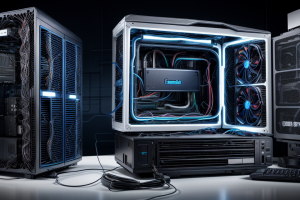
Are you tired of dealing with the heat generated by your computer’s CPU and other components? Do you want to improve the performance and lifespan of your system? If so, you may be considering liquid cooling as a solution. Liquid cooling is a method of cooling that uses a liquid coolant to transfer heat away from the components and dissipate it outside the case. It’s a popular choice among PC enthusiasts and gamers, but is it worth the investment for you? In this guide, we’ll explore the pros and cons of liquid cooling and help you determine if it’s the right choice for your system.
What is Liquid Cooling and How Does it Work?
The Basics of Liquid Cooling
Liquid cooling is a method of cooling computer components using a liquid coolant that is circulated through a system of tubes and heat exchangers. This cooling method is often used for high-performance computers and gaming PCs that generate a lot of heat. The main advantage of liquid cooling is its ability to remove heat more efficiently than air cooling, which can be beneficial for overclocking and maintaining a stable temperature.
Here are the basics of liquid cooling:
- The coolant: A liquid coolant is used to absorb heat from the components and transfer it to the heat exchanger. There are various types of coolants available, such as water, glycol, and phase-change materials. The choice of coolant depends on the application and the type of heat exchanger used.
- The pump: The pump circulates the coolant through the system. It is usually powered by an electric motor or a water-driven pump. The pump’s flow rate is controlled by a controller, which can adjust the flow according to the system’s needs.
- The heat exchanger: The heat exchanger is a device that transfers heat from the coolant to the air or liquid. There are two types of heat exchangers: radiators and cold plates. Radiators are commonly used in liquid cooling systems and consist of rows of fins that increase the surface area for heat transfer. Cold plates are used for cooling individual components, such as CPUs and GPUs.
- The reservoir: The reservoir holds the coolant and serves as a storage tank for the system. It is usually placed in a location where it can be easily accessed for refilling or maintenance.
- The tubing: The tubing is used to connect the components of the liquid cooling system. It is usually made of flexible material, such as rubber or plastic, and is available in various sizes and colors.
Liquid cooling offers several advantages over air cooling, including better heat transfer, lower noise levels, and lower temperatures. However, it can be more complex to set up and maintain than air cooling. Therefore, it is essential to evaluate whether the benefits of liquid cooling outweigh the cost and complexity of the system.
How Liquid Cooling Works: A Step-by-Step Guide
Liquid cooling is a type of computer cooling system that uses liquid instead of air to remove heat from the CPU and other components. It is often used in high-performance computing applications, such as gaming, content creation, and scientific simulations. Here’s a step-by-step guide on how liquid cooling works:
- Coolant circulation: The liquid coolant is circulated through a system of tubes and pipes, typically made of plastic or metal, which are attached to the CPU and other components that need to be cooled.
- Heat transfer: As the liquid coolant flows through the system, it absorbs heat from the CPU and other components. The heat transfer is typically achieved through a process called thermal conductivity, where the liquid coolant absorbs heat from the components and carries it away to a radiator or heat exchanger.
- Radiator or heat exchanger: The liquid coolant is then passed through a radiator or heat exchanger, which is typically a metal plate with fins or a set of tubes, where the heat is dissipated into the surrounding air. This process is often referred to as “radiator” or “heat exchanger”.
- Coolant recirculation: The liquid coolant is then pumped back to the CPU and other components to repeat the process.
- Maintenance: Liquid cooling systems require regular maintenance, including checking the coolant level, cleaning the tubes and radiator, and replacing the coolant every few years to ensure optimal performance.
Overall, liquid cooling offers several advantages over traditional air cooling, including better heat dissipation, lower noise levels, and lower temperatures. However, it can also be more complex to set up and maintain. Therefore, it’s important to consider the specific needs of your PC and determine if liquid cooling is worth the investment.
The Pros and Cons of Liquid Cooling for PC
Advantages of Liquid Cooling
One of the main advantages of liquid cooling for PC is its ability to provide more efficient cooling compared to traditional air cooling solutions. Liquid cooling systems use a liquid coolant to absorb heat from the CPU and other components, which is then circulated through a radiator and fan to dissipate the heat. This allows for better heat transfer and can result in lower temperatures and quieter operation.
Another advantage of liquid cooling is its ability to provide more customization options for PC builders. Liquid cooling systems come in a variety of configurations, from simple all-in-one solutions to more complex custom loops. This allows builders to choose the right solution for their specific needs and preferences.
Liquid cooling also offers the potential for higher performance. Some liquid cooling systems are designed specifically for overclocking, allowing for higher CPU clock speeds and better performance. Additionally, liquid cooling can help to reduce the risk of thermal throttling, which can occur when the CPU temperature gets too high and the clock speed is reduced to prevent damage.
Finally, liquid cooling can be a more aesthetically pleasing option for PC builders who want to create a custom, high-end build. Many liquid cooling systems come with RGB lighting, which can add a touch of color and style to the build. Additionally, the sleek, compact design of liquid cooling systems can be a great way to show off high-end components and create a unique, custom look.
Disadvantages of Liquid Cooling
Although liquid cooling offers several advantages, it also has some drawbacks that must be considered before making an investment. Here are some of the disadvantages of liquid cooling for PC:
- Complexity: Liquid cooling systems are more complex than air cooling systems, and they require more maintenance. They also require a more complex setup process, which can be challenging for those who are not familiar with PC hardware.
- Risk of leaks: Liquid cooling systems use liquid to dissipate heat, which means there is a risk of leaks. Even a small leak can cause significant damage to the system, including short circuits and corrosion.
- Higher cost: Liquid cooling systems are generally more expensive than air cooling systems, and they may require additional components such as reservoirs, pumps, and tubing. This can make them a more expensive investment upfront.
- Limited compatibility: Liquid cooling systems may not be compatible with all PC cases, and they may require modifications to the case or motherboard to fit properly. This can limit the options for case and motherboard selection.
- Maintenance requirements: Liquid cooling systems require regular maintenance to ensure they are functioning properly. This includes checking for leaks, cleaning the tubing, and refilling the coolant. Failure to maintain the system can result in reduced performance and potential damage to the components.
In summary, while liquid cooling offers several advantages, it is important to consider the potential disadvantages before making an investment. It may be a good option for high-performance gaming or overclocking, but it may not be necessary for basic computing tasks.
How to Determine if Liquid Cooling is Right for Your PC
Determining whether liquid cooling is right for your PC involves considering several factors. Here are some things to consider:
- CPU and GPU Temperatures
One of the primary reasons to consider liquid cooling is to lower CPU and GPU temperatures. If your system is running hot, liquid cooling can help to reduce temperatures and prevent throttling or crashes.
- Noise Levels
Liquid cooling systems are often quieter than air cooling systems, making them an attractive option for users who want a silent PC. If noise levels are a concern, liquid cooling may be the right choice for you.
- Aesthetics
Liquid cooling systems can add a touch of style to your build, with customizable lighting and tubing options. If you’re building a PC for show, liquid cooling may be the way to go.
- Cost
Liquid cooling systems can be expensive, especially if you opt for high-end components. It’s important to weigh the cost of the system against the benefits it will provide.
- Maintenance
Liquid cooling systems require more maintenance than air cooling systems, as they need to be cleaned and maintained regularly to prevent leaks and ensure optimal performance. If you’re not comfortable with regular maintenance, air cooling may be a better option.
Overall, liquid cooling can be a great option for PCs that run hot or for users who want a silent build. However, it’s important to consider all the factors before making a decision.
The Different Types of Liquid Cooling Systems
Closed Loop Liquid Cooling Systems
Closed loop liquid cooling systems are the most commonly used type of liquid cooling system for PCs. These systems consist of a sealed loop that contains a mixture of water and glycol or a different type of coolant. The coolant is pumped through a radiator, where it is cooled by fans, and then returned to the CPU block.
Advantages of Closed Loop Liquid Cooling Systems:
- Ease of Installation: Closed loop systems are relatively easy to install and require no maintenance.
- Low Cost: Closed loop systems are generally less expensive than other types of liquid cooling systems.
- Compatibility: Closed loop systems are compatible with most PC cases and components.
Disadvantages of Closed Loop Liquid Cooling Systems:
- Limited Customization: Closed loop systems are not customizable and cannot be upgraded.
- Maintenance: Closed loop systems require regular maintenance to ensure that the coolant remains clean and free of debris.
- Noise: Closed loop systems can be noisy due to the fans required to cool the radiator.
When considering a closed loop liquid cooling system, it is important to weigh the advantages and disadvantages and determine if it is the right choice for your PC.
Open Loop Liquid Cooling Systems
Open loop liquid cooling systems are the most basic and common type of liquid cooling system used in personal computers. In this system, a coolant is circulated through a series of tubes and heat exchangers to transfer heat away from the components and into the surrounding air.
The main advantage of open loop systems is their simplicity and affordability. They are relatively easy to install and require minimal maintenance. The coolant used in open loop systems is usually a mixture of water and antifreeze, which helps to prevent freezing and corrosion.
However, open loop systems have some limitations. Since the coolant is not recirculated, it can evaporate over time, leading to a decrease in cooling efficiency. Additionally, open loop systems can be loud, as the pump and fans can create noise during operation.
In conclusion, open loop liquid cooling systems are a good option for those looking for an affordable and simple cooling solution. However, they may not be the best choice for users who require high cooling performance or low noise levels.
All-In-One (AIO) Liquid Cooling Systems
- AIO liquid cooling systems are self-contained units that include all the necessary components, such as the water block, pump, radiator, and reservoir, all in one package.
- These systems are easy to install and require minimal maintenance, making them a popular choice for many PC builders.
- The primary advantage of AIO systems is their simplicity and ease of installation. Since all the components are pre-assembled, users can easily swap out the water block for a new one, if needed.
- Additionally, AIO systems are generally more affordable than custom liquid cooling setups, making them an attractive option for those on a budget.
- However, it’s worth noting that AIO systems are typically less efficient than custom setups, as they often have less surface area for heat dissipation and are more prone to leaks.
- Overall, AIO liquid cooling systems are a great option for those looking for an easy-to-install and affordable cooling solution, but may not be the best choice for those who prioritize performance above all else.
How to Choose the Right Liquid Cooling System for Your PC
When it comes to choosing the right liquid cooling system for your PC, there are several factors to consider. Here are some of the most important ones:
1. Your PC’s Specifications
The first thing you need to consider is your PC’s specifications. This includes the size and shape of your PC case, the type of CPU and GPU you have, and the amount of space available for radiators and reservoirs. Different liquid cooling systems have different requirements, so it’s important to choose one that will fit your PC’s specifications.
2. Your Budget
Another important factor to consider is your budget. Liquid cooling systems can range from relatively affordable to very expensive, depending on the type and quality of components used. Before making a purchase, it’s important to set a budget and choose a system that fits within it.
3. Your Cooling Goals
Finally, you need to consider your cooling goals. Are you looking to overclock your CPU and GPU for better performance? Do you want to reduce noise levels in your PC? Are you concerned about the environment and want to use a more eco-friendly cooling solution? Depending on your goals, you may want to choose a different type of liquid cooling system.
Overall, choosing the right liquid cooling system for your PC requires careful consideration of several factors. By taking the time to assess your PC’s specifications, budget, and cooling goals, you can choose a system that will provide the best performance and longevity for your PC.
How to Install Liquid Cooling in Your PC
Preparing Your PC for Liquid Cooling Installation
Before installing liquid cooling in your PC, there are several steps you should take to prepare your system for the installation process. These steps will help ensure that the installation process goes smoothly and that your system is properly cooled.
Checking Your System’s Compatibility
The first step in preparing your PC for liquid cooling installation is to check its compatibility with the liquid cooling system you plan to install. Different liquid cooling systems may have different requirements, so it’s important to make sure that your system can accommodate the new cooling solution.
One thing to consider is the size of your PC case. Some liquid cooling systems may require a larger case to accommodate the radiator and other components, so it’s important to make sure that your case is compatible before proceeding with the installation.
Removing Dust and Debris
Before installing a liquid cooling system, it’s important to remove any dust and debris that may be present in your PC. This is because liquid cooling systems rely on airflow to dissipate heat, and any obstruction in the airflow can hinder the cooling process.
To remove dust and debris, you can use compressed air or a vacuum cleaner to blow out any loose particles from your PC’s fans and other components. You can also use a can of compressed air to blast away any stubborn grime and debris that may be stuck in hard-to-reach places.
Upgrading Your PC’s Fans
Another important step in preparing your PC for liquid cooling installation is upgrading your PC’s fans. Liquid cooling systems rely on fans to push air through the radiator and dissipate heat, so it’s important to have high-quality fans that can handle the increased airflow.
When upgrading your fans, it’s important to choose fans that are compatible with your PC’s motherboard and power supply. You should also consider the size and speed of the fans, as well as their noise level.
Cleaning Your PC’s Components
Finally, it’s important to clean your PC’s components before installing a liquid cooling system. This includes cleaning your CPU, GPU, and motherboard, as well as any other components that will be exposed to the liquid cooling solution.
To clean your components, you can use a mild detergent and water mixture, or a specialized PC cleaning solution. Be sure to follow the manufacturer’s instructions when cleaning your components, and avoid submerging any components in the cleaning solution.
By following these steps, you can prepare your PC for liquid cooling installation and ensure that your system is properly cooled.
Steps for Installing a Closed Loop Liquid Cooling System
Installing a closed loop liquid cooling system can be a daunting task, but with the right tools and instructions, it can be done easily. Here are the steps to follow:
- Preparation: Before starting the installation process, it is important to prepare the necessary tools and equipment. This includes a flathead screwdriver, a power supply, a tubing cutter, and a thermal paste.
- Removing the old thermal paste: If you are upgrading from an air cooling system, it is likely that there is old thermal paste on the CPU. Use the flathead screwdriver to carefully remove the old thermal paste from the CPU.
- Installing the CPU block: Carefully remove the CPU cooler from the CPU socket and set it aside. Install the CPU block by aligning it with the CPU socket and tightening the screws.
- Mounting the radiator: Attach the radiator to the case using the screws provided. Make sure to place it in a location where there is good airflow.
- Installing the pump: Attach the pump to the CPU block using the provided brackets. Make sure it is securely in place.
- Installing the fans: Install the fans on the radiator. Connect the fans to the pump using the provided fan cables.
- Installing the reservoir: Install the reservoir by attaching it to the radiator. Fill the reservoir with coolant and connect it to the pump.
- Testing the system: Once the installation is complete, test the system to make sure everything is working properly. Check the temperatures and make sure they are within the acceptable range.
By following these steps, you can install a closed loop liquid cooling system in your PC. Remember to take your time and follow the instructions carefully to ensure a successful installation.
Steps for Installing an Open Loop Liquid Cooling System
Installing an open loop liquid cooling system can be a complex process, but it is a rewarding one. It allows for efficient cooling and a quieter experience. Here are the steps to follow:
- Choose the Right Components
Select a liquid cooling kit that fits your PC’s components and budget. Consider the CPU, GPU, and motherboard’s compatibility with the kit.
- Prepare the System
Disassemble the PC, remove the stock cooling solution, and clean the CPU and motherboard thoroughly. Apply thermal paste to the CPU and GPU.
- Install the Block
Mount the block on the CPU using the provided bracket. Secure the block and ensure it makes contact with the CPU.
- Connect the Hoses
Connect the hoses from the block to the radiator and the reservoir. Make sure there are no leaks or kinks in the hoses.
- Fill the System
Fill the system with distilled water or a mixture of distilled water and antifreeze. Ensure the reservoir is full, and there is enough liquid to cover the CPU and GPU.
- Connect the Pump
Mount the pump on the radiator and connect it to the power supply. Set the pump speed according to the manufacturer’s instructions.
- Install the Radiator
Mount the radiator on the case and connect the fans to it. Ensure proper airflow through the radiator.
- Test the System
Power on the PC and check for any leaks or issues. Ensure the temperatures are lower than with the stock cooling solution.
- Maintain the System
Regularly check the fluid level, clean the radiator, and replace the fluid as needed. Maintaining the system will ensure its longevity and efficiency.
Overall, installing an open loop liquid cooling system can be a challenging task, but with patience and attention to detail, it can be done successfully. It requires choosing the right components, preparing the system, installing the block, connecting the hoses, filling the system, connecting the pump, installing the radiator, testing the system, and maintaining the system.
Troubleshooting Common Issues with Liquid Cooling Installation
Troubleshooting common issues with liquid cooling installation is a crucial aspect of ensuring that your PC runs smoothly and efficiently. Some of the most common issues that you may encounter during installation include leaks, clogs, and compatibility problems. Here are some troubleshooting tips to help you resolve these issues:
- Leaks: Leaks are one of the most common issues that users encounter during liquid cooling installation. Leaks can occur due to a variety of reasons, including faulty fittings, loose connections, or damaged tubing. To troubleshoot leaks, you should start by checking all of your connections to ensure that they are secure. You should also inspect your tubing for any signs of damage, such as cracks or punctures. If you find any damage, you will need to replace the damaged tubing.
- Clogs: Clogs can occur in the liquid cooling system if the tubing becomes clogged with debris or other foreign objects. To troubleshoot clogs, you should start by disconnecting the clogged section of tubing and inspecting it for any signs of debris or other blockages. If you find any blockages, you can remove them using a cleaning solution or a small brush. If the blockage is too severe to remove, you may need to replace the affected section of tubing.
- Compatibility problems: Compatibility problems can occur if the liquid cooling components you have chosen are not compatible with your PC. To troubleshoot compatibility problems, you should start by checking the specifications of your PC and the liquid cooling components you have chosen to ensure that they are compatible. If you find that they are not compatible, you may need to choose different components or seek assistance from a professional.
By following these troubleshooting tips, you can resolve common issues with liquid cooling installation and ensure that your PC runs smoothly and efficiently.
Maintenance and Troubleshooting for Liquid Cooling Systems
Regular Maintenance for Liquid Cooling Systems
Proper maintenance is crucial to ensure the longevity and efficiency of a liquid cooling system. Regular maintenance involves a combination of cleaning, inspection, and replacement of components. Here are some essential tasks to perform during regular maintenance:
- Fluid Change: Over time, the coolant can become contaminated with dust, debris, and other impurities. It is recommended to change the coolant every 2-3 years, depending on the system’s usage and environmental conditions. Be sure to follow the manufacturer’s guidelines for the type of coolant to use and the process for changing it.
- Cleaning Components: The liquid cooling system’s components, such as radiators, reservoirs, and tubing, should be cleaned regularly to prevent buildup of dust and debris. Use a mild detergent and warm water to clean the components, followed by a rinse with distilled water. Allow the components to air dry before reassembling the system.
- Inspecting for Leaks: Check the system for any signs of leaks or damage to the tubing, fittings, or other components. Leaks can cause the coolant to become diluted or contaminated, leading to inefficient cooling. Repair any leaks promptly to prevent further damage.
- Inspecting for Blockages: Check for any blockages or clogs in the system, such as in the radiator or tubing. This can reduce the flow of coolant and hinder the cooling performance. Remove any blockages using a flush solution or a cleaning brush.
- Replacing Components: Over time, some components of the liquid cooling system may wear out or become damaged. Replace any damaged components, such as fans or pumps, as needed to maintain optimal performance.
Regular maintenance helps to prevent issues with the liquid cooling system and ensures that it continues to operate efficiently. By following these guidelines, you can extend the lifespan of your liquid cooling system and keep your PC running smoothly.
How to Troubleshoot Common Issues with Liquid Cooling Systems
When it comes to liquid cooling systems, there are a few common issues that may arise. However, with proper troubleshooting techniques, these issues can be quickly resolved. Here are some steps to follow when troubleshooting common issues with liquid cooling systems:
Check for Leaks
One of the most common issues with liquid cooling systems is leaks. If you notice a puddle of liquid around your PC, it’s likely that there is a leak in the system. To troubleshoot this issue, start by checking all of the connections and fittings to ensure that they are properly seated. If you notice any loose or damaged fittings, replace them immediately.
Inspect the Radiator
Another common issue with liquid cooling systems is a clogged radiator. Over time, the radiator can become clogged with dust and debris, which can reduce its efficiency and cause your PC to overheat. To troubleshoot this issue, disassemble the radiator and clean it thoroughly with a radiator cleaning solution. Be sure to follow the manufacturer’s instructions for cleaning and disassembly.
Check the Pump
The pump is another critical component of the liquid cooling system. If the pump is not functioning properly, it can cause issues with circulation and cooling. To troubleshoot this issue, start by checking the power supply to ensure that the pump is receiving enough power. If the pump is still not functioning, it may need to be replaced.
Inspect the Reservoir
The reservoir is responsible for holding the liquid coolant. If the reservoir is not functioning properly, it can cause issues with circulation and cooling. To troubleshoot this issue, start by checking the level of coolant in the reservoir. If the level is low, add more coolant as needed. If the level is fine, check for any blockages or damage to the reservoir.
Check the Fans
The fans are responsible for circulating the liquid coolant throughout the system. If the fans are not functioning properly, it can cause issues with circulation and cooling. To troubleshoot this issue, start by checking the power supply to ensure that the fans are receiving enough power. If the fans are still not functioning, it may need to be replaced.
By following these steps, you can troubleshoot common issues with liquid cooling systems and keep your PC running smoothly.
How to Extend the Lifespan of Your Liquid Cooling System
Extending the lifespan of your liquid cooling system is essential to ensure optimal performance and prevent costly repairs or replacements. Here are some tips to help you achieve this:
Regular Maintenance
Regular maintenance is critical to the longevity of your liquid cooling system. Here are some essential maintenance tasks you should perform regularly:
- Check for leaks: Inspect your system for any signs of leaks, which can cause damage to your components and compromise the cooling efficiency of your system.
- Clean the radiator: Dirt and dust can accumulate in the radiator, reducing its ability to dissipate heat. Regularly clean the radiator to ensure it is functioning optimally.
- Inspect the tubing: Check the tubing for any signs of wear or damage, such as kinks or cracks. Replace any damaged tubing to prevent leaks and ensure optimal cooling performance.
Upgrading Components
Upgrading your components can also help extend the lifespan of your liquid cooling system. Here are some components you may want to consider upgrading:
- Water block: Over time, the water block can become clogged with debris, reducing its cooling efficiency. Consider upgrading to a higher quality water block to improve cooling performance.
- Pump: The pump is responsible for circulating the coolant throughout the system. Upgrading to a higher quality pump can improve the flow rate and longevity of your system.
- Reservoir: The reservoir can become dirty over time, reducing the cooling efficiency of your system. Consider upgrading to a transparent reservoir to make it easier to inspect and clean.
Monitoring Temperatures
Monitoring the temperatures of your components is crucial to ensure that your liquid cooling system is functioning optimally. Here are some tips to help you monitor temperatures:
- Use monitoring software: There are many software programs available that can monitor the temperatures of your components and provide real-time feedback.
- Set temperature thresholds: Set temperature thresholds for each component to ensure that they are not overheating.
- Monitor fan speeds: Ensure that the fans are spinning at optimal speeds to provide efficient cooling.
By following these tips, you can extend the lifespan of your liquid cooling system and ensure optimal performance for years to come.
Recap of the Pros and Cons of Liquid Cooling
Liquid cooling is a popular choice for PC enthusiasts who seek high-performance cooling solutions. It offers several advantages over traditional air cooling, but it also comes with some drawbacks. Let’s take a closer look at the pros and cons of liquid cooling.
Pros:
- Efficient Thermal Performance: Liquid cooling systems are designed to deliver efficient thermal performance. They use liquid coolants that have lower boiling points than air, which allows them to dissipate heat more effectively. As a result, they can provide better thermal performance than air cooling, especially when it comes to high-performance gaming and overclocking.
- Low Noise Levels: Liquid cooling systems are often quieter than air cooling systems. The liquid coolant can absorb more noise than air, which makes it easier to achieve low noise levels. This can be particularly beneficial for users who prefer a quieter system or who are sensitive to noise levels.
- Compatibility with High-Performance Components: Liquid cooling systems are ideal for high-performance components such as CPUs and GPUs. They can handle the heat generated by these components and ensure that they operate within safe temperature ranges. This can be particularly important for users who want to push their components to the limit.
Cons:
- Cost: Liquid cooling systems can be more expensive than air cooling systems. They require custom water blocks, radiators, and other components that can add to the cost. Additionally, maintenance and troubleshooting can be more challenging than with air cooling, which can add to the overall cost.
- Maintenance: Liquid cooling systems require regular maintenance to ensure that they continue to perform optimally. This includes monitoring the coolant levels, cleaning the system, and checking for leaks. Failure to maintain the system properly can result in reduced performance or even system failure.
- Limited Compatibility: Liquid cooling systems may not be compatible with all cases or components. Users may need to purchase special brackets or adapters to ensure that the system fits properly. Additionally, leaks can occur if the system is not installed properly, which can damage components and cause system failure.
In conclusion, liquid cooling offers several advantages over air cooling, including improved thermal performance, low noise levels, and compatibility with high-performance components. However, it also comes with some drawbacks, including higher cost, maintenance requirements, and limited compatibility. Ultimately, the decision to use liquid cooling will depend on the user’s needs and preferences.
Factors to Consider Before Investing in Liquid Cooling
When considering investing in a liquid cooling system for your PC, there are several factors to take into account. These factors can help you determine whether liquid cooling is the right choice for your specific needs and budget. Here are some key factors to consider:
Cooling Performance
One of the primary factors to consider when investing in a liquid cooling system is its cooling performance. Liquid cooling systems typically offer better cooling performance than air cooling systems, particularly for high-performance CPUs and GPUs. However, it’s important to note that not all liquid cooling systems are created equal. Some systems may be better suited for specific types of CPUs or GPUs, so it’s important to research the cooling capabilities of each system before making a purchase.
Compatibility
Another important factor to consider is compatibility. Liquid cooling systems often require custom installation and may not be compatible with all PC cases or components. It’s important to ensure that the liquid cooling system you choose is compatible with your existing hardware before making a purchase. Additionally, you may need to purchase additional hardware or components to make the system work properly, such as fittings or tubing.
Cost
Cost is also an important factor to consider when investing in a liquid cooling system. While liquid cooling systems can offer better cooling performance than air cooling systems, they are typically more expensive to purchase and maintain. Additionally, custom installation may require the services of a professional, which can add to the overall cost. It’s important to weigh the benefits of liquid cooling against the cost before making a purchase.
Noise Levels
Finally, noise levels are an important factor to consider when investing in a liquid cooling system. While liquid cooling systems can offer better cooling performance, they can also be louder than air cooling systems. This may be a concern for users who prioritize a quiet PC environment. It’s important to research the noise levels of each liquid cooling system before making a purchase to ensure that it meets your needs.
Overall, investing in a liquid cooling system for your PC can offer several benefits, including better cooling performance and quieter operation. However, it’s important to consider several factors before making a purchase, including cooling performance, compatibility, cost, and noise levels. By carefully evaluating these factors, you can determine whether liquid cooling is the right choice for your specific needs and budget.
Final Recommendations for PC Users
When it comes to liquid cooling systems for PCs, there are a few key recommendations that users should keep in mind to ensure optimal performance and longevity.
- Regular Maintenance:
One of the most important aspects of owning a liquid cooling system is regular maintenance. This includes cleaning the reservoir, tubing, and radiator, as well as checking the coolant levels and ensuring that all fans are functioning properly. - Monitor Temperatures:
It’s essential to monitor the temperatures of your PC components, especially the CPU and GPU, to ensure that they are not overheating. Overheating can lead to reduced performance and even hardware damage, so it’s important to keep an eye on these temperatures at all times. - Invest in Quality Components:
Investing in high-quality components for your liquid cooling system is crucial. This includes the pump, radiator, fans, and reservoir, as well as the coolant itself. By investing in quality components, you can ensure that your system will perform optimally and last for many years to come. - Seek Expert Assistance:
If you’re new to liquid cooling systems, it may be helpful to seek assistance from an expert. This can include PC builders, IT professionals, or even online forums where users can share their knowledge and experience with liquid cooling systems. - Keep an Eye on Trends:
Finally, it’s important to keep an eye on the latest trends and developments in liquid cooling technology. This can include new coolants, pumps, radiators, and other components that can improve the performance and longevity of your system.
By following these recommendations, PC users can ensure that their liquid cooling systems are performing optimally and will last for many years to come.
FAQs
1. What is liquid cooling for PC?
Liquid cooling for PC is a method of cooling the components of a computer by circulating liquid coolant through a closed loop system. This is in contrast to air cooling, which uses fans to blow air over the components.
2. How does liquid cooling work?
Liquid cooling works by circulating a liquid coolant through a closed loop system that is connected to the components of the computer. The liquid coolant absorbs heat from the components and carries it away to a radiator, where it is cooled by fans. The cooled liquid is then pumped back to the components to continue the cooling process.
3. What are the benefits of liquid cooling for PC?
The main benefit of liquid cooling for PC is that it is more efficient than air cooling. Liquid cooling can remove more heat from the components, which can result in lower temperatures and better performance. Additionally, liquid cooling is quieter than air cooling, as the liquid coolant does not make noise as it flows through the system.
4. Is liquid cooling for PC expensive?
Liquid cooling for PC can be more expensive than air cooling, as it requires a closed loop system and liquid coolant. However, the cost has been coming down in recent years, and it is now more affordable than ever before. Additionally, the increased performance and longer lifespan of the components can make liquid cooling a worthwhile investment.
5. How do I know if liquid cooling is right for my PC?
If you are building a high-performance PC or overclocking your components, liquid cooling may be a good option for you. Additionally, if you are concerned about the noise level of your PC, liquid cooling may be a good choice as it is quieter than air cooling. Ultimately, the decision to use liquid cooling will depend on your specific needs and budget.
6. How do I install liquid cooling in my PC?
Installing liquid cooling in your PC will require some disassembly of your case and the installation of the closed loop system. It is recommended that you follow a detailed guide or watch a tutorial to ensure that you properly install the liquid cooling system. Additionally, it is important to use high-quality liquid coolant and to properly maintain the system to ensure its longevity.
7. Can I use liquid cooling on all components in my PC?
Liquid cooling can be used on the CPU, GPU, and other components of your PC. However, it is important to check the compatibility of your components with the liquid cooling system before installation. Additionally, some components may require specific brackets or adapters to be used with the liquid cooling system.
8. How long does liquid cooling last?
With proper maintenance, a liquid cooling system can last for many years. It is important to regularly check the liquid coolant for leaks and to clean the radiator and fans to ensure that they are functioning properly. Additionally, it is recommended to replace the liquid coolant every 2-3 years to ensure optimal performance.
9. Can I use any liquid coolant with my liquid cooling system?
It is important to use high-quality liquid coolant that is compatible with your liquid cooling system. Check the specifications of your system and use a liquid coolant that meets those specifications. Additionally, it is recommended to use a premixed coolant to avoid the need for mixing and to ensure the correct ratio of coolant to water.
10. Can I convert my air-cooled PC to a liquid-cooled PC?
Yes, it is possible to convert a PC from air cooling to liquid cooling. However, this will require the installation of a closed loop system and the purchase of liquid coolant. It is recommended to follow a detailed guide or watch a tutorial to ensure that you properly convert your PC to liquid cooling. Additionally, it is important to properly maintain the system to ensure its longevity.