Troubleshooting is an essential skill that everyone should know. Whether you’re a homeowner trying to fix a leaky faucet or a IT professional trying to resolve a computer issue, troubleshooting techniques can help you identify and solve problems quickly and efficiently. In this article, we will discuss the six basic troubleshooting techniques that everyone should know. From identifying the problem to testing solutions, these techniques will help you tackle any issue that comes your way. So, let’s get started and learn how to troubleshoot like a pro!
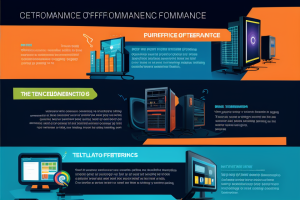
Understanding Troubleshooting Techniques
Importance of troubleshooting techniques
Troubleshooting techniques are crucial for resolving problems in any field, from technology to finance to healthcare. They are a systematic approach to identifying the root cause of an issue and finding a solution.
There are several reasons why troubleshooting techniques are important:
- They save time and resources: By identifying the root cause of a problem, troubleshooting techniques allow you to fix the issue once and for all, rather than merely treating the symptoms. This saves time and resources in the long run.
- They improve accuracy and precision: Troubleshooting techniques involve gathering data and analyzing it to identify patterns and relationships. This leads to more accurate and precise solutions.
- They promote continuous improvement: By analyzing data and identifying patterns, troubleshooting techniques help identify areas for improvement. This can lead to process optimization and continuous improvement.
- They increase safety and reduce risk: In many fields, troubleshooting techniques are used to identify and mitigate potential risks and hazards. This can increase safety and reduce the likelihood of accidents or failures.
Overall, troubleshooting techniques are essential for anyone who wants to be effective in problem-solving. They provide a structured approach to identifying and resolving issues, leading to more efficient and effective solutions.
Types of troubleshooting techniques
There are several types of troubleshooting techniques that can be used to diagnose and solve problems. Here are some of the most common types:
- Logical troubleshooting: This technique involves using logic and reasoning to identify the root cause of a problem. It involves breaking down a problem into smaller parts and analyzing each part to determine the cause of the problem.
- Experiential troubleshooting: This technique involves using past experiences to identify the cause of a problem. It involves drawing on previous experiences to identify patterns and commonalities that can help solve a problem.
- Procedural troubleshooting: This technique involves following a set of procedures or steps to identify the cause of a problem. It involves following a specific process to isolate the problem and determine the cause.
- Physical troubleshooting: This technique involves using physical inspection and testing to identify the cause of a problem. It involves using tools and equipment to test and measure various aspects of a system to identify the cause of a problem.
- Analytical troubleshooting: This technique involves using data analysis and statistical methods to identify the cause of a problem. It involves collecting and analyzing data to identify patterns and trends that can help solve a problem.
- Functional troubleshooting: This technique involves testing the functionality of a system to identify the cause of a problem. It involves testing different components and functions of a system to isolate the problem and determine the cause.
The 6 basic troubleshooting techniques
- The 5 Whys Technique
- This technique involves asking the question “why” multiple times to get to the root cause of a problem.
- It is useful for complex problems that have multiple underlying causes.
- To use this technique, start with the problem and then ask “why” until you reach the root cause.
- The Process of Elimination
- This technique involves systematically eliminating potential causes until the problem is identified.
- It is useful for problems that have a clear set of possible causes.
- To use this technique, make a list of potential causes and then systematically eliminate them until the problem is identified.
- The Problem-Solving Matrix
- This technique involves breaking down a problem into smaller parts and then systematically solving each part.
- It is useful for problems that have multiple interrelated causes.
- To use this technique, create a matrix with the problem on one axis and potential causes on the other axis. Then, systematically solve each part of the problem.
- The Fishbone Diagram
- This technique involves identifying the various factors that contribute to a problem and then analyzing how they are interconnected.
- It is useful for problems that have multiple underlying causes.
- To use this technique, draw a fishbone diagram with the problem at the center and the various contributing factors branching out from it. Then, analyze how the factors are interconnected.
- The SWOT Analysis
- This technique involves analyzing a problem in terms of its strengths, weaknesses, opportunities, and threats.
- It is useful for problems that require a strategic approach.
- To use this technique, create a SWOT analysis diagram with the problem in the center and the various factors surrounding it. Then, analyze how the factors relate to each other.
- The KISS Principle
- This technique involves keeping things simple and avoiding unnecessary complexity.
- It is useful for problems that have become too complex or confusing.
- To use this technique, take a step back and simplify the problem as much as possible. Eliminate unnecessary factors and focus on the core issue.
Step 1: Identify the Problem
Define the problem
Before attempting to fix a problem, it is important to clearly define the issue at hand. This may seem like an obvious step, but many people jump straight into trying to solve the problem without fully understanding what they are dealing with. Taking the time to properly define the problem will help you to better understand the cause of the issue and the steps you will need to take to resolve it.
Here are some tips for defining the problem:
- Start by gathering all relevant information about the issue. This may include documentation, reports, or any other materials that can provide insight into the problem.
- Clearly articulate the symptoms of the problem. What is happening and how is it affecting the system or process?
- Identify the scope of the problem. Is it affecting a single user or multiple users? Is it limited to a specific time frame or happening continuously?
- Determine the impact of the problem. What are the consequences of not fixing the issue?
- Consider any potential causes of the problem. What may have caused the issue to occur in the first place?
By following these steps, you will be well on your way to defining the problem and developing a plan to resolve it.
Gather information
When faced with a problem, the first step in troubleshooting is to gather as much information as possible about the issue. This information will help you understand the scope of the problem and identify potential solutions. Here are some key points to consider when gathering information:
- Define the problem: Clearly state the issue you are trying to solve. This will help you stay focused and avoid wasting time on irrelevant details.
- Gather details: Collect as much information as possible about the problem. This may include details about when and where the problem occurred, as well as any error messages or other relevant information.
- Talk to witnesses: If possible, talk to anyone who may have witnessed the problem or who may have information that could help you understand the issue.
- Research the problem: Use online resources, such as forums or help pages, to see if others have encountered the same problem and found a solution.
- Check logs and records: If applicable, review any logs or records related to the problem to see if they contain any useful information.
By gathering as much information as possible about the problem, you will be better equipped to identify the root cause and find an effective solution.
Analyze the situation
When troubleshooting a problem, the first step is to analyze the situation. This involves taking a closer look at the problem and trying to understand what might be causing it. Here are some key points to consider when analyzing a situation:
- Gather information: Collect as much information as possible about the problem. This might include talking to people who were involved, reviewing documents or records, and examining any relevant data.
- Define the problem: Once you have gathered all the information, it’s important to define the problem clearly. This means identifying the specific symptoms of the problem, as well as any underlying causes.
- Consider possible solutions: Once you have defined the problem, it’s time to start thinking about possible solutions. This might involve brainstorming ideas, researching potential solutions, or consulting with experts.
- Prioritize solutions: Once you have a list of possible solutions, it’s important to prioritize them based on their potential impact and feasibility. This will help you focus your efforts on the most effective solutions.
- Develop an action plan: Finally, you should develop an action plan that outlines the steps you will take to address the problem. This should include timelines, resources needed, and metrics for measuring success.
Step 2: Isolate the Cause
Process of elimination
When troubleshooting, one effective technique is the process of elimination. This method involves systematically eliminating potential causes until the root cause is identified. The process of elimination is a logical and structured approach that helps to streamline the troubleshooting process and save time. Here are the steps involved in the process of elimination:
- Identify the problem: The first step is to clearly define the problem. This involves gathering all available information about the issue, including symptoms, timelines, and any error messages.
- Brainstorm potential causes: Once the problem has been defined, brainstorm a list of potential causes. This should include both obvious and not-so-obvious possibilities.
- Test each potential cause: Start testing each potential cause, one at a time, in order to isolate the root cause. Begin with the most likely cause and work your way down the list.
- Eliminate potential causes: As you test each potential cause, eliminate those that do not cause the problem. This helps to narrow down the list of potential causes and focus on the most likely cause.
- Identify the root cause: Once all potential causes have been tested, the root cause should become apparent. This is the cause that, when eliminated or corrected, will resolve the problem.
- Verify the root cause: After identifying the root cause, it’s important to verify that it is indeed the cause of the problem. This can be done by testing the solution and ensuring that the problem does not recur.
By following the process of elimination, you can effectively troubleshoot problems and identify the root cause. This technique is particularly useful when dealing with complex systems or issues with multiple potential causes.
Test and check
- The first step in troubleshooting is to identify the problem area. This involves a systematic approach to testing and checking different components and systems to determine the root cause of the issue.
- The process of testing and checking involves a series of steps that include:
- Visual inspection: This involves visually inspecting the equipment or system to identify any physical damage or malfunctions. This can include checking for loose connections, broken parts, or other visible issues.
- Functional testing: This involves testing the equipment or system to determine if it is functioning properly. This can include running diagnostic tests, performing a series of actions to see if the system responds as expected, or checking for specific error messages.
- Sensory testing: This involves using your senses to test the equipment or system. This can include listening for unusual sounds, smelling for unusual odors, or feeling for unusual vibrations.
- Measurement testing: This involves using specialized equipment to measure different parameters of the system, such as temperature, pressure, or voltage. This can help identify any deviations from normal operating conditions.
- Inspection testing: This involves inspecting the equipment or system for any signs of wear or damage that could be causing the problem. This can include checking for corrosion, rust, or other signs of degradation.
- Logical testing: This involves using logic and reasoning to test the equipment or system. This can include checking for logical errors in the programming, or analyzing the system’s inputs and outputs to identify any inconsistencies.
- By following these steps, you can effectively isolate the cause of the problem and take the necessary steps to resolve it. It is important to remember that troubleshooting is a process of elimination, and by systematically testing and checking different components and systems, you can narrow down the possible causes of the issue until you find the root cause.
Verify the cause
One of the most important steps in troubleshooting is verifying the cause of the problem. This can be done by using various techniques and tools to identify the root cause of the issue.
Check the manual
The first step in verifying the cause of a problem is to check the manual. The manual provides detailed instructions on how to operate and maintain the equipment or system. It may also provide information on common problems and their solutions.
Use diagnostic tools
Diagnostic tools such as multimeters, oscilloscopes, and data loggers can be used to identify the cause of a problem. These tools can help identify electrical or mechanical issues, as well as issues with software or firmware.
Observe and document
Observing and documenting the problem can help identify the cause. This can include taking notes on when the problem occurs, what conditions are present when the problem occurs, and what actions were taken before the problem occurred.
Consult with experts
Consulting with experts such as engineers or technicians can help identify the cause of a problem. They may have experience with similar problems and can provide insight into potential solutions.
Test and verify
Once the cause of the problem has been identified, it is important to test and verify the solution. This can involve testing the equipment or system to ensure that the problem has been resolved and that the solution is effective.
Overall, verifying the cause of a problem is a critical step in troubleshooting. By using a combination of techniques and tools, it is possible to identify the root cause of the issue and develop an effective solution.
Step 3: Develop a Solution
Brainstorming
Brainstorming is a troubleshooting technique that involves generating a list of potential solutions to a problem. It is a collaborative process that encourages creativity and diversity of thought.
How to conduct a brainstorming session
- Gather a diverse group of people who have knowledge and experience related to the problem.
- Clearly define the problem and the desired outcome.
- Encourage open and uninhibited participation from all members of the group.
- Use a variety of techniques to generate ideas, such as mind mapping, word association, and random word generation.
- Record all ideas generated, without evaluating or judging them.
- Review the list of ideas and identify potential solutions that can be implemented.
Benefits of brainstorming
- Encourages creativity and innovation
- Generates a wide range of potential solutions
- Involves multiple perspectives and expertise
- Improves communication and collaboration within a team
- Helps to identify potential risks and challenges associated with proposed solutions
Common pitfalls to avoid
- Allowing dominant personalities to dominate the discussion
- Focusing too much on the problem rather than potential solutions
- Evaluating or judging ideas during the brainstorming session
- Lack of preparation or clear definition of the problem
- Failing to implement selected solutions effectively
Choose the best solution
When it comes to troubleshooting, the key to success is choosing the best solution. With so many options available, it can be difficult to determine which one will work best for your specific situation. However, by following these tips, you can make an informed decision and choose the best solution for your needs.
First, it’s important to understand the different types of solutions available. Some solutions may be quick and easy, but they may not provide long-term results. On the other hand, some solutions may take more time and effort, but they can provide a more permanent solution. It’s important to weigh the pros and cons of each option before making a decision.
Next, consider the cause of the problem. Different solutions may be more effective for different types of problems. For example, if the problem is caused by a software issue, a software-based solution may be the best choice. However, if the problem is caused by a hardware issue, a hardware-based solution may be more effective.
It’s also important to consider the resources available to you. Some solutions may require specialized equipment or expertise that you may not have access to. Make sure to choose a solution that you have the resources to implement effectively.
Finally, it’s important to choose a solution that is flexible and adaptable. As you continue to troubleshoot and solve problems, you may encounter new challenges that require different solutions. Make sure to choose a solution that can be adapted and modified as needed to meet your changing needs.
By following these tips, you can choose the best solution for your troubleshooting needs and achieve long-term success.
Implement the solution
After identifying the root cause of the problem and devising a solution, the next step is to implement the solution. This step involves putting the solution into action and monitoring its effectiveness.
It is important to have a clear plan of action when implementing the solution. This plan should include specific steps that need to be taken, the resources required, and the timeline for completion.
When implementing the solution, it is also important to consider any potential risks or unintended consequences. For example, a solution that may fix one problem could inadvertently create another problem. Therefore, it is important to monitor the situation closely and make adjustments as necessary.
In addition, it is important to communicate the solution and its implementation plan to all relevant parties. This ensures that everyone is aware of the plan and can provide support as needed.
Overall, implementing the solution requires careful planning, attention to detail, and effective communication. By following these steps, you can successfully implement the solution and address the problem at hand.
Test the solution
Once you have developed a solution, it is important to test it to ensure that it is effective in resolving the problem. Here are some steps to follow when testing your solution:
- Isolate the problem: Before testing your solution, it is important to isolate the problem to ensure that the solution is being tested on the correct issue. This can be done by recreating the problem and ensuring that the solution is applied only to that specific issue.
- Implement the solution: Once the problem has been isolated, implement the solution and monitor its effectiveness. It is important to note any changes or improvements in the system or process.
- Test the solution: After implementing the solution, it is important to test it thoroughly to ensure that it is effective in resolving the problem. This can be done by recreating the problem and monitoring the system or process to ensure that the solution has resolved the issue.
- Evaluate the results: Once the solution has been tested, it is important to evaluate the results to determine its effectiveness. This can be done by comparing the results before and after implementing the solution and determining if the problem has been resolved.
- Iterate and refine: If the solution is not effective, it may be necessary to iterate and refine the solution until it is effective in resolving the problem. This may involve making adjustments to the solution or testing alternative solutions.
By following these steps, you can effectively test your solution and ensure that it is effective in resolving the problem.
Step 4: Prevent Future Problems
Identify potential problems
To prevent future problems, it is essential to identify potential issues before they arise. Here are some steps to help you identify potential problems:
- Analyze the problem: When troubleshooting a problem, take the time to analyze the issue thoroughly. This will help you identify any underlying issues that may have caused the problem in the first place.
- Look for patterns: Pay attention to any patterns that may be emerging. For example, if you notice that a particular piece of equipment fails frequently, there may be an underlying issue that needs to be addressed.
- Check for known issues: Check for any known issues or recalls related to the equipment or software you are using. Manufacturers often issue recalls or warnings for specific issues, so it is important to stay up-to-date on any known problems.
- Consult with experts: If you are unsure about how to identify potential problems, consult with experts in the field. They may be able to provide insights into common issues and potential solutions.
- Document your findings: Document any potential problems you identify, including the date, time, and location of the issue. This will help you track patterns and identify any recurring issues.
By following these steps, you can identify potential problems before they become serious issues, saving time and money in the long run.
Develop preventive measures
Developing preventive measures is an essential part of troubleshooting as it helps to avoid future problems. There are several ways to develop preventive measures, including:
- Conducting regular maintenance: Regular maintenance helps to prevent breakdowns and ensure that equipment is working efficiently. It is essential to follow the manufacturer’s guidelines for maintenance and to keep records of when maintenance was done.
- Identifying potential problems: Identifying potential problems before they occur can help to prevent them from happening. This can be done by analyzing past problems and identifying patterns or common causes.
- Implementing safety measures: Implementing safety measures can help to prevent accidents and injuries. This can include training employees on safety procedures, implementing safety protocols, and providing personal protective equipment.
- Updating equipment: Outdated equipment can be a significant source of problems. It is essential to keep equipment up to date and replace it when necessary to prevent problems from occurring.
- Improving processes: Improving processes can help to prevent problems from occurring. This can include analyzing processes, identifying inefficiencies, and implementing changes to improve efficiency and effectiveness.
- Creating backup systems: Creating backup systems can help to prevent problems from occurring in the event of a failure. This can include creating backup files, implementing redundancy in systems, and having a disaster recovery plan in place.
By developing preventive measures, you can help to avoid future problems and keep your equipment and processes running smoothly.
Implement preventive measures
Proactively addressing potential issues is a crucial aspect of effective troubleshooting. Implementing preventive measures helps minimize the likelihood of recurring problems and reduces the need for extensive troubleshooting efforts in the future. Here are some steps to consider when implementing preventive measures:
- Identify potential causes: Analyze past incidents and identify the root causes of the problems. This information can help in the development of strategies to prevent future issues.
- Implement a maintenance schedule: Regular maintenance and inspection of equipment and systems can help identify potential problems before they escalate. A well-structured maintenance schedule should include regular checks, cleaning, and repairs as needed.
- Train personnel: Ensure that employees are adequately trained to operate equipment and systems correctly. Proper training can help prevent errors that may lead to system failures or malfunctions.
- Monitor systems: Implement monitoring systems to detect any anomalies or potential issues. This allows for prompt action to be taken to address any problems before they escalate.
- Document procedures: Create detailed, step-by-step procedures for addressing potential issues. This documentation can help in the identification and resolution of problems more efficiently in the future.
- Update equipment and systems: Keep equipment and systems up-to-date with the latest software, firmware, and hardware updates. This can help address known vulnerabilities and improve overall system performance.
- Encourage a culture of continuous improvement: Foster an environment where employees are encouraged to suggest improvements to processes and systems. This can help identify potential issues and lead to the implementation of preventive measures.
By implementing these preventive measures, you can significantly reduce the likelihood of future problems and minimize the need for extensive troubleshooting efforts. Proactive planning and execution of these steps can help ensure the smooth operation of equipment and systems, ultimately leading to increased efficiency and productivity.
Monitor and evaluate
When it comes to troubleshooting, prevention is always better than cure. After you have resolved the issue at hand, it is important to take steps to prevent similar problems from occurring in the future. One of the most effective ways to do this is by monitoring and evaluating your system or process on an ongoing basis.
Monitoring involves keeping a close eye on your system or process to detect any unusual behavior or signs of trouble. This can include things like regularly checking system logs, monitoring performance metrics, or conducting regular tests to ensure that everything is functioning as it should be.
Evaluating, on the other hand, involves assessing the effectiveness of your troubleshooting efforts and making changes as needed. This can involve analyzing data to identify patterns or trends, seeking feedback from users or stakeholders, or conducting post-mortem analyses to determine the root cause of problems.
By regularly monitoring and evaluating your system or process, you can identify potential issues before they become major problems, and make proactive changes to prevent future problems from occurring. This can save you time, money, and frustration in the long run, and help you to maintain a stable and reliable system or process over time.
Step 5: Document the Process
Importance of documentation
Proper documentation is essential when it comes to troubleshooting. It allows you to keep track of the steps you’ve taken, the solutions you’ve tried, and the results of each attempt. This can be particularly useful when dealing with complex problems that require multiple attempts to resolve.
In addition to helping you keep track of your progress, documentation can also help you communicate more effectively with others who may be involved in the troubleshooting process. By providing a clear record of the steps you’ve taken and the results you’ve achieved, you can help ensure that everyone involved has a clear understanding of the problem and the efforts that have been made to resolve it.
Moreover, documentation can also serve as a valuable reference for future troubleshooting efforts. If you encounter a similar problem in the future, you can refer back to your documentation to see what worked (or didn’t work) in the past. This can save you time and effort by allowing you to skip over steps that didn’t work before and focus on new approaches.
Overall, proper documentation is a critical component of effective troubleshooting. It helps you stay organized, communicate effectively, and learn from past experiences.
Documentation process
Effective documentation is critical to troubleshooting. By creating a detailed record of the troubleshooting process, you can track progress, identify patterns, and prevent future issues. The following steps outline the process of creating a thorough and effective documentation:
- Identify the problem: Clearly define the issue at hand. This includes a description of the symptoms, when and where the problem occurs, and any relevant data or error messages.
- Gather information: Collect all relevant information related to the problem. This may include logs, screenshots, configuration files, and any other data that could provide insight into the issue.
- Develop a plan: Outline the steps you will take to troubleshoot the problem. This should include the tools and resources you will use, as well as any potential solutions or workarounds.
- Execute the plan: Begin the troubleshooting process, following the plan you have developed. Document each step taken, including any changes made and the results of each action.
- Analyze the data: Review the information collected during the troubleshooting process. Look for patterns or trends that may indicate the cause of the problem.
- Implement a solution: Based on the analysis, implement a solution to the problem. Document the steps taken to resolve the issue, as well as any changes made to the system or configuration.
- Verify the solution: Test the solution to ensure that the problem has been resolved. Document the results of the test and any additional steps taken to verify the solution.
- Archive the documentation: Store the documentation in a secure location for future reference. This may include a shared drive, a trouble ticket system, or a knowledge base.
By following these steps, you can create a comprehensive and effective documentation of the troubleshooting process. This documentation can be invaluable when working to resolve similar issues in the future, as well as for training and educating others on troubleshooting techniques.
Maintain documentation
Effective documentation is essential for efficient troubleshooting. By maintaining proper documentation, you can ensure that your troubleshooting process is accurate, repeatable, and scalable. Here are some tips for maintaining thorough and accurate documentation:
- Use a standardized format: Use a consistent format for all your documentation, including date, time, problem description, actions taken, and resolution. This will make it easier to search and compare documentation across different problems.
- Be detailed: Be as detailed as possible when documenting your troubleshooting process. Include screenshots, log files, and any other relevant information that can help you or someone else reproduce the problem.
- Keep it up-to-date: Update your documentation regularly to reflect any changes in the system or the troubleshooting process. This will ensure that your documentation remains accurate and relevant.
- Make it accessible: Make sure your documentation is easily accessible to everyone who needs it. Use a shared drive or a cloud-based platform that can be accessed from anywhere.
- Review and revise: Review your documentation regularly to ensure that it is accurate and up-to-date. Revise it as needed to reflect any changes in the system or the troubleshooting process.
By following these tips, you can maintain accurate and thorough documentation that will help you troubleshoot problems more efficiently and effectively.
Update documentation
Documenting the troubleshooting process is a crucial step in ensuring that the problem is not encountered again in the future. This step involves updating the documentation to reflect the steps taken to resolve the issue, as well as any changes made to the system or process to prevent the problem from recurring.
Updating documentation is important for several reasons. Firstly, it ensures that the problem is not forgotten or overlooked in the future. By documenting the steps taken to resolve the issue, future troubleshooters can refer to this documentation to quickly identify and resolve the problem.
Secondly, updating documentation helps to maintain consistency in the system or process. By documenting the changes made to resolve the problem, future changes can be made in a consistent manner, reducing the risk of introducing new problems into the system.
Lastly, updating documentation is important for training purposes. By documenting the troubleshooting process, new employees can be trained on how to identify and resolve problems quickly and efficiently, reducing downtime and increasing productivity.
In summary, updating documentation is a critical step in the troubleshooting process. It ensures that problems are not forgotten, maintains consistency in the system or process, and helps to train new employees on how to troubleshoot effectively.
Step 6: Review and Improve
Review the troubleshooting process
When you’ve completed the troubleshooting process, it’s important to take a step back and review what you’ve done. This can help you identify any areas where you may have made mistakes or overlooked important details. Additionally, reviewing the process can help you identify ways to improve your troubleshooting skills in the future.
Here are some steps you can take to review the troubleshooting process:
- Gather all relevant information: Before you can effectively review the troubleshooting process, you need to gather all relevant information. This includes any notes you took during the troubleshooting process, as well as any data or logs that may be relevant.
- Identify any mistakes or oversights: Once you have all the relevant information, go through the process step by step and identify any mistakes or oversights you may have made. This could include missing important details, making incorrect assumptions, or overlooking critical information.
- Look for areas of improvement: In addition to identifying mistakes, it’s also important to look for areas where you can improve your troubleshooting skills. This could include improving your diagnostic skills, learning new tools or techniques, or developing a better understanding of the systems you’re working with.
- Document your findings: Finally, be sure to document your findings and any recommendations for improvement. This can help you track your progress over time and ensure that you’re continuously improving your troubleshooting skills.
By following these steps, you can effectively review the troubleshooting process and identify areas for improvement. This can help you become a more effective troubleshooter and reduce the likelihood of future issues.
Identify areas for improvement
Troubleshooting is an ongoing process that requires continuous improvement. Once you have identified the root cause of a problem and implemented a solution, it is important to evaluate the effectiveness of your actions. By reviewing the results of your troubleshooting efforts, you can identify areas for improvement and refine your techniques.
To identify areas for improvement, consider the following steps:
- Collect data: Gather data on the problem, including any error messages, logs, or other relevant information. This data can help you determine the scope of the problem and identify patterns or trends.
- Measure performance: Measure the performance of the system or process after the solution has been implemented. Compare the results to the expected performance to determine if the problem has been fully resolved.
- Monitor for recurrence: Monitor the system or process over time to determine if the problem has recurred. If the problem does recur, it may indicate that the original solution was not effective or that new problems have emerged.
- Solicit feedback: Solicit feedback from users or stakeholders to determine if the problem has been fully resolved. This feedback can help you identify any lingering issues or areas where additional improvements may be needed.
- Document your efforts: Document your troubleshooting efforts, including the steps you took, the solutions you implemented, and the results of your efforts. This documentation can help you refine your troubleshooting techniques and identify areas for improvement in the future.
By following these steps, you can identify areas for improvement and refine your troubleshooting techniques over time. This ongoing process of review and improvement is essential for ensuring that your troubleshooting efforts are effective and efficient.
Implement improvements
Once you have identified the root cause of a problem and have implemented a solution, it is important to review the situation to ensure that the problem does not recur. This step is critical to ensuring that the problem is fully resolved and will not cause further issues in the future. Here are some steps you can take to implement improvements:
- Document the problem and the solution: It is important to document the problem and the solution so that you can refer to it in the future. This will help you to avoid making the same mistake again and will also be useful for training new employees.
- Review the root cause analysis: Review the root cause analysis to ensure that the problem has been fully resolved. If the problem has not been fully resolved, you may need to go back and repeat the previous steps.
- Implement a preventive maintenance plan: Preventive maintenance is a proactive approach to maintenance that is designed to prevent equipment failures. This can include routine inspections, cleaning, and repairs.
- Implement process improvements: Process improvements are changes that are made to a process to make it more efficient or effective. This can include changes to the way work is done, the tools used, or the people involved in the process.
- Implement training programs: Training programs are designed to teach employees how to do their jobs more effectively. This can include technical training, soft skills training, or leadership development.
- Implement quality control measures: Quality control measures are designed to ensure that products or services meet certain standards. This can include inspections, testing, or other measures to ensure that the product or service is of acceptable quality.
Overall, implementing improvements is an important step in the troubleshooting process. By taking the time to review the problem and the solution, and by implementing preventive measures, process improvements, training programs, and quality control measures, you can help to ensure that the problem does not recur and that your systems and processes are running smoothly.
Evaluate the effectiveness of improvements
Once you have implemented the improvements suggested by the previous steps, it is important to evaluate their effectiveness. This will help you determine whether the changes have had the desired impact and whether further action is needed. Here are some ways to evaluate the effectiveness of improvements:
- Performance metrics: Use performance metrics to evaluate the effectiveness of improvements. For example, if you implemented a code optimization to improve the speed of a program, you can use metrics such as execution time and memory usage to evaluate the impact of the change.
- User feedback: Gather feedback from users to evaluate the effectiveness of improvements. This can be done through surveys, user testing, or focus groups. User feedback can provide valuable insights into how well the improvements have addressed the needs of the users.
- Error logs: Analyze error logs to evaluate the effectiveness of improvements. Error logs can provide information on the types of errors that are occurring and where they are occurring in the system. This can help you identify areas that still need improvement.
- System monitoring: Monitor the system to evaluate the effectiveness of improvements. This can include monitoring performance metrics, system resource usage, and system availability. System monitoring can help you identify areas that still need improvement and ensure that the system is operating as expected.
- Comparative analysis: Compare the performance of the system before and after the improvements were made. This can help you identify the specific areas where the improvements have had the greatest impact and where further action may be needed.
By evaluating the effectiveness of improvements, you can ensure that the changes made have had the desired impact and identify areas that still need improvement. This will help you continue to improve the system and provide a better experience for the users.
FAQs
1. What are the 6 basic troubleshooting techniques?
The 6 basic troubleshooting techniques are:
1. Check the power source
2. Check the connections
3. Check the hardware
4. Check the software
5. Check the settings
6. Check the documentation
2. Why is it important to know basic troubleshooting techniques?
Knowing basic troubleshooting techniques is important because it helps you to identify and fix problems quickly and efficiently. This can save time, money, and frustration in the long run. It is also useful in both personal and professional settings.
3. What is the first step in troubleshooting?
The first step in troubleshooting is to identify the problem. This can be done by gathering information about the issue, such as what happened before the problem occurred, what is happening now, and what is expected to happen. This information can help narrow down the possible causes of the problem.
4. How do I check the power source in troubleshooting?
To check the power source in troubleshooting, make sure that the power cord is plugged in and that the outlet is working. If the device is battery-powered, check that the batteries are properly installed and have sufficient charge. Also, check that the power switch is turned on.
5. How do I check the connections in troubleshooting?
To check the connections in troubleshooting, make sure that all cables and wires are properly connected. Also, check for any loose connections or broken components. If necessary, try using a different cable or wire to see if the problem persists.
6. How do I check the hardware in troubleshooting?
To check the hardware in troubleshooting, make sure that all components are properly installed and functioning. Check for any physical damage or signs of wear and tear. If necessary, replace any faulty components.
7. How do I check the software in troubleshooting?
To check the software in troubleshooting, make sure that all updates and patches are installed. Check for any error messages or other indications of a software problem. If necessary, try reinstalling the software or seeking help from the software vendor.
8. How do I check the settings in troubleshooting?
To check the settings in troubleshooting, make sure that all settings are properly configured. Check for any inconsistencies or conflicts between different settings. If necessary, adjust the settings to see if the problem resolves.
9. How do I check the documentation in troubleshooting?
To check the documentation in troubleshooting, consult the user manual or other documentation provided with the device. Check for any warnings or cautions that may apply to the problem. If necessary, seek help from the manufacturer or other experts.